I've made a couple of runs at this soup, as it's one of David's favorites, but hadn't found a recipe we really loved until this one. And hey, it was the simplest one I tried! It's also very adaptable, fitting well with our goal of cooking for the next week with only what we already have in the house. It'd be a good Crockpot recipe, but was too much to fit in mine, so it simmered on the stove all through this cold afternoon. We had a few hours of October sunshine today, but the afternoon ended dark and drizzling, so soup and corn bead and applesauce were perfect. Mary wasn't here for dinner, but Else, now a year and a half, devoured it.
Notes: I had no celery or carrot, but added a little celery seed. I like the addition of the chopped spinach quite a bit, but you could omit. We used 3 smoked bratwurst and the flavor was fabulous. If doing in a Crockpot, I'd soak the beans on the stove, then add with tomatoes to the Crockpot and put on high while sauteing the vegetables, then add everything to the Crockpot. I'd suggest cooking for a few hours on high then turning down to low, but you might want to cook part of the time with the lid off so it cooks down a bit. You probably wouldn't add the entire 3 cups of water, either, if going this route. Like most bean soups, this should freeze very well. It makes a really large amount, easily enough for a meal for six.
Navy Bean Soup
*1 lb. of dried Navy beans, rinsed
*6 cups of water
*1 TBS Better than Bouillon, Chicken, OR a couple bouillon cubes
(OR sub 3 cups of chicken broth for 3 cups of the water)
*1 TBS olive oil
*1 onion, chopped
*2 stalks celery, chopped
*2 carrots, chopped
*3 cloves garlic, minced
*1/2 lb ham, chopped OR 3 smoked bratwurst, sliced into thin rounds OR 6 slices bacon, chopped
*1 14.5 oz can chopped tomatoes, with juice
*2 TBS Worcestershire sauce
*1 bay leaf
*3 more cups of water
*Chopped fresh parsley, 2 TBS or so
*Chopped baby spinach, a cup or two, or one small container frozen chopped spinach
*lots of black pepper, salt to taste
-Cover beans with a generous amount of water; bring to a boil then let them sit and soak for an hour. Drain.
-Towards the end of that hour, heat olive oil in large soup pot over medium heat. Add chopped onions, celery, carrot and your choice of meat. Saute until the onions are golden. Add garlic and saute a few minutes more, watching closely to make sure the garlic doesn't burn.
-Add beans to pot, along with tomatoes, Worcestershire, and bay leaf. Bring to a boil then reduce heat to simmer and simmer, covered, for 2 hours.
-Remove lid from pot and add 3 more cups water. Bring back to a simmer and simmer, uncovered, for another two hours.
-During the last few minutes, add chopped parsley and spinach. Add pepper to taste. Don't salt it until you've tasted it, as this will be pretty salty already with the Worcestershire and ham.
Wednesday, October 17, 2007
Wednesday, October 03, 2007
Blueberry Vanilla Syrup
Just a brief post today-I had to write this recipe out anyway to post on discussion of canning and putting food by on Chowhound.com, so thought I'd cut and paste it here.
We love blueberries. We are blessed to live in Oregon, with an abundance of local, amazingly good, inexpensive produce available to us six months out of the year. It's actually a fairly painful blessing sometimes, as the produce pours in and it's very challenging to keep up with it all. I have wanted to cry, some days, coming home from work, standing in the kitchen with a toddler hanging from my leg, looking at ten pounds of cucumbers that must be made into pickles tonight or they'll go bad. I love the results of canning: the jars lined up on the counter, the feeling of concrete satisfaction, the smugness of being prepared when the next Depression hits (something everyone in my family seems to worry about subconsciously: will there be enough food? We might all die!). I just sometimes don't like the actual work of canning: the endless wait for the water to boil, then come back to a boil; the sticky disaster the kitchen becomes; the jars that slip back into the boiling water and splash.
This recipe is a welcome break from all that. You get the satisfaction of canning with much less work. First, you start with blueberries. Blueberries are the best U-Pik fruit, because you can throw them into the freezer without doing anything else. When you're ready to use them, rinse the frost, pick out a few stems and you're good to go. We have a great organic farm a few minutes from our house, so the whole family can eat as many as we want while picking (though have to make a side note here and say the blueberry farm was being run by the Blueberry Nazi this year, which put a bit of a damper on our experience: You don't park there! No kids in the trees! No kids in the bathrooms! Don't pick there! No soup for you! You come back one year!). Back to the recipe. The other great thing about it is you don't have to process it once the jars are filled, thus eliminating the whole boiling water heating time sink. The downside of that is that you must keep the finished product refrigerated, but that's not a big deal as you'll probably only keep one or two jars for yourself and give the rest away. As good as it is, there's only so much syrup you can go through on your own.
Find your vanilla beans in bulk if you can. The ones sold in a jar at the supermarket are insanely expensive.
This recipe is a modification of a Sheila Lukins recipe from the fabulous U.S.A. Cookbook.
1 1/2 lbs blueberries
3 c sugar
1 vanilla bean, split lengthwise
3/4 c. water
2 TBS fresh lemon juice
Combine blueberries (rinsed) and sugar in a large heavy saucepan. Toss gently with a rubber spatula. Stick vanilla bean in center. Let stand for an hour (you can start w/frozen berries-just prolong this step).
Add water and lemon juice and bring to a boil over high heat, stirring occasionally. Reduce heat and simmer, skimming foam, until it starts to thicken. It will take 15 minutes or so. It will continue to thicken as it cools so don't cook too long.
Remove from heat and strain through a fine sieve. Cool (taste when cool-if too sweet, add a little more lemon juice) and funnel into sterilized bottles. Although she says it will keep up to two months, I've found that it keeps indefinitely, refrigerated.
Unlike most canning recipes, you can double this one. Everything will take longer, but it works fine.
It's a gorgeous deep blue color-very pretty to give in nice stoppered bottles (the kind with a wire cage and rubber gasket-this is insanely messy stuff, so don't give it in a bottle with a cork). As mentioned previously, it's beautiful on ice cream, delicious on waffles, and my brother-in-law has had great success basting salmon with it when grilling.
Wednesday, September 19, 2007
Grilled Chicken, Red Onion, and Mint Kebabs
Apparently, the only break I took to show me that it was summer time was to completely stop updating my blog. (Man, that was pathetic, and completely untrue. Although I didn't take much time off this summer, we still had a very languid summer-as much as one can have with a job and two children). Still, it seemed a waste to spend any precious summer minutes in front of the computer, and so, though we cooked and ate some really wonderful food this summer, I didn't write about it. Since my main purpose with this blog is to keep track of my favorite recipes, I need to start searching my brain and remembering the new dishes that we loved.
This one is easy to remember and to tell you about, since I'm just going to link directly to the epicurious.com recipe. It's an astonishingly simple dish that is one of the best things I've made in a long time. The mint and red onions are both essential: the mint leaves get wonderfully crispy, the red onion all charred and sweet. I finish with just a squeeze of lemon juice over the kebabs, rather than basting with olive oil and lemon juice. Both ways would be fantastic; mine has a few less calories; their's is probably a little moister (do be careful not to overcook your chicken). We love this with brown rice or pita, tzatziki, and a greek salad (recipes for the latter two to follow one of these days).
Add this to the category of food you will eat in spite of the fact that it's healthy, not to be virtuous.
Oh, and funny thing-my sister was up recently from Arizona, and we wanted to cook dinner for our folks' anniversary. Guess what she suggested? Yep....apparently excruciatingly good taste DOES run in our family.
Grilled Chicken, Red Onion, and Mint Kebabs.
Saturday, June 09, 2007
Filbert Crusted Baked Salmon
My dad is learning to cook now that he's retired, and seems to really be enjoying it. He's always done some cooking: barbecuing, of course;a phase of baking a lot of bread when I was a child. His anadama bread (a dark bread with molasses, great with butter and honey) was very, very good. Another bread, that didn't rise, we joked should be used as weights in the back of the pickup.
I grew up thinking of these nuts as filberts, though they are more commonly called by their upper class name of hazelnuts. My Grandpa Delbert raised filberts, and I thought that Filbert was actually his name at one point in my childhood.
The girls and I went to my folks' house for the weekend a few weeks back, to celebrate Dad's birthday and a belated Mother's Day. Dad made the following dish, from a recipe in The Oregonian. He modified it slightly by accident, adding the filberts with the mustard instead of sprinkling them on later as directed in the original recipe. I made the recipe at home the next week and made it as originally directed, but have to say I like Dad's version better (though both were very good). This is great with a salad and twice baked potatoes or brown rice pilaf and steamed asparagus. I found wild caught, Alaskan salmon fillets at Trader Joe's for about $6.00 a pound, enough for our family, though the recipe calls for two pounds. Don't use farm raised salmon; it'd be better to substitute a different fish.
*1 tsp sea salt
*2 cloves garlic, minced
*2 tsp herbes de provence (I used that recipe as a guide and made something close to it with what I had on had, as I didn't want to go to the store)
*2 TBS whole grained or Dijon mustard (I used Dijon)
*3 TBS extra virgin olive oil
*1 tsp fresh lemon juice
*1 2 lb fillet of wild salmon
*3-4 TBS finely chopped filberts (hazelnuts) (Note: subbed cashews one day, and they worked very well, too).
-In a small bowl, combine salt, garlic, herbes, mustard, olive oil and lemon juice, mixing with a fork til emulsified. If you'd like, stir in the filberts now.
-Place salmon on a rimmed baking sheet that you've sprayed with Pam or lightly oiled. Spread the mustard mixture thickly over the top and sides of the fillet. Refrigerate for an hour.
-Preheat oven to 350. Bake salmon, uncovered, for about 10 minutes, then sprinkle the nuts over and lightly press them into the coating if you didn't add them earlier. Return to oven and bake up to another 15 minutes, until salmon flakes when tested with a fork (note: our salmon finished much earlier than recipe suggested it would, so test early as you don't want it to dry out).
Pesto!
Although it's raining and not even 60 degrees here right now, it has largely been beautiful so far this early summer. We are not very skilled gardeners, but we are determined to do better this year, and to this end we have dug out an additional bed in our front yard, the sunniest part of our lot. With new soil, free plants from neighbors and relatives, and enthusiastic watering, this small patch is exploding beautifully. We have a lot of spinach, several beet plants (using both of those to make a regular side dish of sauteed greens with pinenuts and garlic), several artichoke plants, peas twining over anything else, spring onions, herbs, and eight or so tomato plants.
We have basil in the ground, but it's nowhere near being ready to harvest in significant quantities (and saving it from the snails and slugs is a constant battle here), so we picked some up at the farmer's market last weekend and made this amazingly flavorful and pungent pesto, that we try to make in huge quantities every year. Two bunches were about enough for two batches. Normally, we'll make two or three batches at a time and freeze at least one of them, but this time we've been eating it over several days. To freeze, spoon into an icecube tray you reserve for such uses, pour a little olive oil on top, and then transfer to a freezer bags or boxes when solid.
Serving ideas: great as is, on pasta or vegetables. We like to brush a thick layer on salmon then bake or barbecue. This week, we've been enjoying it mixed half and half with ricotta, then tossed with spaghetti. I think that mellows the flavor out a little for kids and it adds a little more nutrition (and helps your pesto last a little longer). Both my girls love this-Mary just ate two servings for lunch, and the baby will eat as much as we feed her. Cooks Illustrated suggests mixing a batch of this with 1/4 cup pasta cooking water until smooth, then tossing with a pound of cooked spaghetti.
Recipe a slight modification from the version in Cooks' Illustrated: The New Best Recipe. Toasting the nuts beforehand is essential. We added parsley for the first time with this batch and it was great-added a nice, fresh taste. We also did half walnuts and half pinenuts, and they were good, though I'd suggest toasting them separately as the pinenuts cook much faster.
*1/4 cu pine nutes, walnuts, or almonds
*3 medium garlic cloves, unpeeled
*2 packed cups of fresh basil leaves
*2 TBS fresh parsley leaves (optional)
*6 TBS olive oil (1/4 cup+ 2 TBS)
*1 tsp salt
-Toast the nuts in a small, dry skillet over medium heat, stirring-PutFREQUENTLY, 4-5 minutes or until golden and fragrant. Transfer to a small bowl.
-Toast garlic in empty skillet until fragrant slightly colored, about 7 minutes. Cool, then peel.
-Place basil and parsley in a heavy duty ziploc bag and bang on them with a rolling pin or heavy small skillet until the leaves are all dark and bruised. If you happen to have a mortar and pestle, use that by all means.
-Place all ingredients in a food processor. Whirl, scraping as necessary, until smooth.
*1/4 cup freshly grated Parmesan
Tuesday, June 05, 2007
Banana Pudding
I've been craving banana pudding for days now; oddly enough, I don't think I've ever eaten the classic 'Nilla wafer banana pudding before. Yet I craved it. I'd purchased a box of the aforementioned wafers on sale recently and have been amazed by how good they are-not fancy, not complicated, but full of vanilla flavor and delicious. I think that lead me into a journey that ended last night with this recipe, a hit with everyone in the family, even Mary, who dislikes bananas. The pudding takes over a rich banana flavor after being poured over the fruit while still warm. The cookies soften, and the whole dessert is reminiscent of a trifle (in fact, I found myself wondering whether it would be possible to brush the wafers with rum *while layering). It is rich and indulgent and comforting.
The recipe is modified from one in Cooking Light Magazine. I normally will only cook the "light" version of a recipe if it tastes as good as the regular version, and this one qualifies. Although the original recipe called for meringue, I substituted whipped cream instead, which I before, and which I knew would keep better for the inevitable leftovers. If you choose to use meringue, I'll throw the directions in at the end. It does save you from wasting the two egg whites you'll have left from the yolk, and it is healthier than the whipping cream.
*1/3 cup all-purpose flour
*1/8 tsp salt
*2 1/2 cups 1% low-fat milk
*1 (14-ounce) can fat-free sweetened condensed milk
*2 large egg yolks (save the whites if you want to do meringue)
*2 teaspoons vanilla extract
*3-4 ripe bananas, sliced (divided); about 3 cups
*45 vanilla wafers(divided)-low fat is fine
If topping with whipped cream:
*1/4 c whipping cream
*1/4 tsp vanilla
*1 TBS powdered sugar
If topping with meringue:
*4 large egg whites (at room temperature)
*1/4 cup sugar
*If using meringue, preheat oven to 325.
*Stir flour and salt in medium saucepan. Gradually add milk and condensed milk and yolks, whisking constantly to keep from getting lumpy.
*Heat over medium heat, stirring constantly (or else the milk will burn), until very thick-this will take anywhere form 8-15 minutes. Make your kid take turns whisking while you find the right dish, slice bananas, etc.
*When nice and thick (should coat the back of a spoon and leave a track when you draw your finger through the coating on said spoon), remove from heat and stir in vanilla extract.
*Arrange a cup of the banana slices on the bottom of a 2 Qt casserole dish. Ladle a third of pudding on top. Arrange 15 vanilla wafers on top. Repeat twice more. On final layer, poke wafers around the sides of the dish and down into the pudding.
Then, either:
*Whip cream, vanilla and powdered sugar together until firm and spread over top.
OR
*Beat egg whites at high speed until foamy; gradually add sugar, one tablespoon at a time, beating until stiff peaks form. Spread meringue over top of pudding, sealing to edges. Bake for 25 minutes or until golden.
In either case, let sit 30 minutes before eating or it will be really soupy.
Monday, April 02, 2007
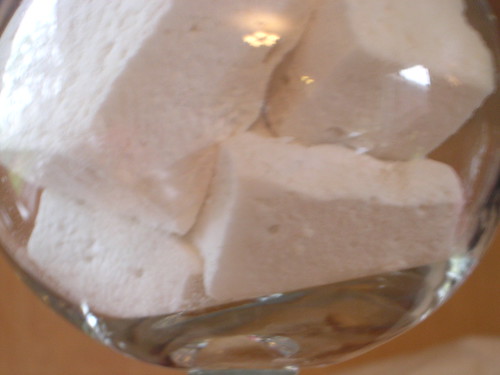
Marshmallows, part 1: Vanilla With Egg Whites
Years ago, when my oldest daughter was a baby, a group of friends and I would meet regularly for Stitch'n'Bitch nights: quilting or knitting, with gossip and wine, hopefully away from the kids. The hostess was responsible for making dessert, and this gradually became a bit of an escalating competition. I think my finest, or most pathetic, hour was when I made s'mores from scratch: homemade graham crackers, marshmallows, fudge sauce and all. I love s'mores when camping, but am not a big fan of marshmallow otherwise; however, these were pretty darn good.
Spin forward 9 years, and that baby is now old enough to help me try again. I spent a bit of time researching recipes, and ended up with a variation of one from Gourmet. Recipes can be divided into with and without eggwhites; this one is with. I'll attempt one later without, and I'd also like to experiment with the variations suggested by fellow Eugene food blogger Brownie Points, who suggest techniques for strawberry marshmallows, among others.
These marshmallows are satisfyingly light and fluffy, with a good vanilla flavor. They melt into hot chocolate in a very satisfying way, and are orgasmic in hot fudge sauce. A huge improvement over JetPuffed, and they sell for more than a buck each at Williams-Sonoma, so you can pretend you've saved lots of money by making them.
You really need to have a standing mixer, like a KitchenAid, for this recipe. It can burn out hand mixers. You'll also need a candy thermometer.
This is an easy recipe for kids to help with-especially older children who can be careful with hot syrup. Mary was really delighted to have made something this cool, though she was pretty sullen through the whole process. She'd like to try rolling them in colored sugar next time.
*about 3/4 cup confectioners' sugar
*2 large egg whites
*3 1/2 envelopes (2 tablespoons plus 2 1/2 teaspoons) unflavored gelatin
*1/2 cup cold water
*2 1/2 cups granulated sugar
*5/8 cup hot water (about 115°F.)
*1/4 teaspoon salt
*3 tsp vanilla
*cornstarch
*Spray bottom and side of 9x13 inch pan with Pam. Powder with powdered sugar, tapping out excess.
*Beat egg whites until they barely hold stiff peaks. Scrape into another bowl, and rinse mixer beaters and bowl.
*Pour cold water into mixer bowl, and sprinkle gelatin over the top. Set aside so gelatin can soften.
*In medium saucepan, over low heat, stir granulated sugar, hot water, and salt until sugar has dissolved. Increase heat til boiling, and boil, without stirring, until mixture reaches 240 on candy thermometer, about 12 minutes. Remove from heat, and stir into gelatin mixture until gelatin is dissolved.
*Beat mixture at high speed (WARNING! Increase heat slowly to high and use those pouring shields if you have them-you don't want this napalm spinning all over your kitchen) until snow-white and tripled in volume, a good six minutes.
*Slowly beat whites and vanilla into this mixture just until combined.
*Scrape into pan, smoothing top, sift 1/4 cup powdered sugar over top, and refrigerate at least three hours until firm.
*Spread a piece of wax paper on counter and loosen edges of marshmallow with a sharp knife. Turn pan upside down and kind of pry on one corner until mixture plops onto wax paper. Cut into whatever size you like with a pizza cutter.
*Mix remaining sugar with an equal amount of cornstarch and sift over, getting all sticky sides covered. Keeps, airtight, at least a week. Modified from Epicurious
Pepperoncini Pork
This is the simplest, and one of the most satisfying, recipes I know. My friend Rick shared it with me-it apparently was his go-to recipe for cooking food at home to impress a date. They really shouldn't've been impressed enough to sleep with him-the recipe is that easy, but I'm guessing it worked. Sometimes. At least frequently enough for him to keep cooking.
We made this recently when my friend Crit was visiting from Australia with her American sweetheart, Jay. They arrived after a long, exhausting trip, and we wanted to fix them something easy, that could be eaten whenever they got here, and that could fulfill a craving someone might have after being out of the States for awhile. Whatever failings there might be about food in America, we do have access to Mexican food, and Mexican ingredients, that is not available in much of the world. Jay and Crit report that you can get flour tortillas and basic salsa in Australia, but not much that's really authentic.
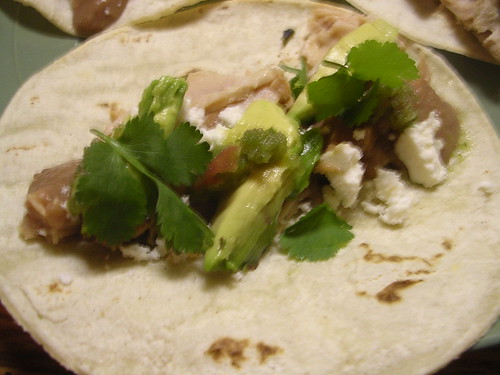
Throw the pork for this recipe in the crockpot in the morning on low. Head to your local Mexican market and pick up good corn tortillas, fresh green salsa, cilantro, cotija cheese, avocado, and some Negro Modelo. Good refried beans are fantastic, too. The pork tastes spicy and vinegary and is incredibly tender. It makes a lot-leftovers freeze well.
*1 pork roast, boneless, about 2-3 pounds. Nothing expensive.
*1 jar, 16 oz or so, pepperoncini.
-Place pork roast in crock pot.
-Pour pepperoncini over.
-Cook on low all day, til pork falls apart when shredded with two forks.
-Remove pork from pot and shred with aforementioned two forks.
-Let people make their own tacos with above ingredients.
Wednesday, March 14, 2007
Orange and Avocado Salad
This is another item on the sadly short list of things so amazingly good I'd eat them even if they weren't healthy. Others honorees includ mangoes, roasted garlic and green beans, really good hummus, fresh pineapple, and red wine.
This salad is simple, delicious, and we could eat it every night of the week. Play it by ear-no rules here.
*An orange, or two, peel sliced off, sliced crosswise into thin rounds.
*An avocado, or two, sliced into thin crescents.
*Black pepper
*Balsamic vinegar
*Goat cheese (optional)
*Olive oil (optional).
-Arrange the avocado and orange slices in circles on a plate, overlapping each other.
-Grind pepper over all.
-Crumble some goat cheese on top, if you'd like.
-Either drizzle with balsamic vinegar, or mix 1 Tbs balsamic to 3 Tbs olive oil (shake in a small jar) to make our standard, everyday vinaigrette.
-Enjoy. It's wonderful if your oranges were cold-chilly deliciousness. Another great variation is to toss the fruits with some nice salad greens, and dress after that.
Yum!
Saturday, February 24, 2007
Rachel's Spicy Pasta Salad
My sister sent me this recipe more than a year ago, and then made it for us on her trip here for our wedding in September of 2005, (which was potluck and the best wedding food we've ever had). The salad is really good and very easy, and the leftovers were fantastic. It was great to be able to munch on in the post-wedding, wrapping paper strewn, chaos. The salad is flavorful and, as she mentions below, easy to customize. I think it would be fine without chicken, as well.
My sister, who lives in Flagstaff, is a fabulous cook. I think we both inherited the cooking gene from our mother, who always seems to have loved cooking, although what she cooks has changed a lot over the years, to adjust to changing tastes (and a husband with cholesterol problems). The food of my childhood was often classic 70s food: homemade macaroni and cheese (which I hated), spaghetti with meat sauce (ditto), turkey tetrazzini (ditto-I was a picky child. Love 'em all now)-side dishes of canned pears on a lettuce leaf topped with grated cheese. But we also ate things like homemade wontons and chile rellenos and Grecian chicken. My mom, and Rachel and I, all love to bake. One shining childhood memory is of the night dinner was a bowl of meringue. I blame my childhood for my deep ingrained feeling that I haven't finished my evening meal if I don't get dessert at the end of it. Nutritionists who recommend treating yourself once or twice a week to a dessert make me laugh.
And back to my sister's salad! Thanks for this, Rae.
Friday, February 23, 2007
Double Chocolate and Orange Pudding
This is a really easy recipe and it tastes fabulously rich. We love chocolate and orange, but you can ommit the orange zest and sub 1 1/2 tsp vanilla for the Gran Marnier and it will be very, very good. It is an easy recipe for children to help with; the measuring and the whisking, even the orange zest grating can be doable by an older child (especially with a microplane, which my daughter and I both find much easier to use than a zester). Leftovers, if you have any, keep fairly well for a few days in a sealed container in the fridge. It's very good slightly warm, or chilled. With or without whipped cream (I usually don't bother). The first time I made this was as a surprise for my folks, after I stayed in their house while they were away for their anniversary. I left dinner fixings in the fridge, salmon and asparagus, I think, but this is all we remember.
Can serve six, spooned into small ramekins or wine glasses, for instance. Tonight, the three of ate it all.
*1/2 c granulated sugar
*1/3 c unsweetened cocoa powder
*2 TBS cornstarch
*1/4 tsp salt
*zest of one orange
*2 c 1/2 and 1/2, or 1 cup whipping cream and 1 cup milk
*3 oz bittersweet chocolate, chopped
*1 TBS Gran Marnier, or other orange liqueur.
-Whisk sugar, cocoa, cornstarch, and salt together in medium saucepan.
*Gradually whisk in one cup of cream until completely smooth. Whisk in remaining cream and orange zest.
*Heat over medium heat, whisking constantly, until it thickens and comes to a boil, about 5 minutes. Continue to whisk for one minute. Remove from heat.
*Add chocolate and Gran Marnier and let stand until chocolate melts, about 5 minutes. Stir just until incorporated (don't stir too much or it will thin out).
*Serve warm or chilled.
Thursday, February 08, 2007
White Chicken Chili
This is a relatively easy recipe, enjoyed by kids and adults. I've served at parties and work potlucks and it's always the first thing to go. If serving to children (or wimpy adults!) be cautious about spicing it up-start mild and add spices to taste after it's cooked. Remember, chili powder gets spicier as it cooks.
I really recommend using dried beans-I like the texture better, and they are much, much cheaper than canned. If you're lucky enough to get local dairy products and chickens, use those, too.
*1/2 pound dried navy beans (about a cup), picked over, OR 2 cans white/cannelini beans, drained and rinsed
*1 large onion, chopped
*1 TBS olive oil
*4 TBS unsalted butter
*1/4 cup all-purpose flour
*2 cups chicken broth
*1 cup half-and-half or milk
*1 teaspoon Tabasco, or to taste
*1 1/2 teaspoons chili powder (or to taste...be careful if yours is very spicy)
*2 teaspoons ground cumin
*1/2 teaspoon salt, or to taste
*1/2 teaspoon pepper, or to taste
*1 7 oz can chopped mild green chiles
*1 1/2 cups frozen corn
*5 boneless skinless chicken breast halves (about 2 pounds), cooked and shredded (I saute them-see below-or poach them)
*1 1/2 cups grated Monterey Jack or white cheddar(about 6 ounces)
*1/2 cup sour cream (light is fine; can add more to taste)
*Cilantro
-If using dried beans, rinse, then cover with two inches of water in large pot, bring to boil, then remove from heat and let sit for an hour. Drain. Place back in the pot, cover again with 2 inches of water, bring to a boil, then reduce to simmer for an hour or until beans are soft.
-If you want to saute your chicken breasts, salt and pepper them. Heat 1 TBS olive oil and 1 TBS of the listed butter over medium heat in large soup pot until sizzling. Add chicken breasts and cook until golden brown on both sides and cooked through. Remove, let cool enough to handle, and shred. (If you happen to have a stand mixer, try this great new technique for shredding meat: put your chicken in the bowl of the mixer with the paddle attachment and turn it on low to medium-magic!) Don't clean the pan.
-Cook onion in 1 TBS olive oil (or the oil-butter mixture from above) in soup pot until soft and turning golden.
-Leave onion in pot. Add (remaining)butter to pot, let melt,and whisk in flour. Cook this roux for 3 minutes over medium-low heat, stirring, or until it starts to turn golden (be careful not to burn). Gradually add broth and half and half or milk, whisking constantly. Bring to a boil, then simmer, whisking occasionally, for 5 minutes or until thick. Add tabasco, chiles, chile powder, peppers, salt, pepper, and cumin. Stir in beans, corn, chicken and either:
-Cook over low heat for 20 minutes, stirring occasionally.
-Transfer to crock pot and cook on low for the afternoon.
-Stir in cheese, cilantro, and sour cream at end of cooking period.
-If you'd like, pass extra cheese, sour cream, and cilantro when serving.
Notes:
-Freezes beautifully!
-If it's too thick, add a little more chicken broth or some beer.
-You can spice it up with some jalapeno or extra chile powder...
-I pureed the peppers in a food processor once before adding them and really liked the way it made the flavors blend.
Saturday, January 13, 2007
Dutch Baby
David made this for breakfast today, and it was by far the best Dutch Baby (puffed oven pancake) that I've ever had. Both girls devoured their portions; Mary said it was the best pancake she had ever had. He used whole wheat flour instead of the traditional white flour, and I really loved the more substantial texture that gave the dish, as well as a heartier flavor. He also cooked it in our indispensable cast iron Dutch oven, rather than in the cast iron frying pan that I usually use. I think this made the sides crispier.
A husband that likes to cook is a beautiful thing. A husband that cooks Saturday breakfast when everybody in the family is sick is priceless.
1/4 c. butter (I prefer salted in this recipe)
3 eggs
3/4 c. milk
3/4 c. whole wheat flour
*Note: this was just right for the three of us and the baby; if you are cooking for more, just scale the recipe up.
*Preheat oven to 425. Place butter in pan, preferable cast iron, and set in oven to melt.
*Beat eggs until light and lemon colored. I've always used a blender for this, but David mixed by hand this morning. If using blender, whirl at high speed for one minute. Gradually pour in milk, then flour, then whirl for an additional 30 seconds (or beat by hand til well-combined).
*Pour directly into hot, melted butter in pan. Return to oven and bake until puffy and well-browned, 20-25 minutes.
Serve immediately. It's traditionally served with powdered sugar and lemon juice. I also like it with salsa and sharp cheddar cheese (good for dinner), or with syrup. Today we had it with powdered sugar and lemon, and our blueberry-vanilla bean syrup on the side.
Wednesday, January 10, 2007
The creamiest ever, stopetop, mac'n'cheese
This amazingly good, decadent, rich and creamy recipe is from Cook's Illustrated in the original The Best Recipe; the recipe in the New Best Recipe is not the same (side note vent here: I HATE it when a new edition of a cookbook I love comes out. I write all over my cookbook, adding comments, mentioning when I served the dish, suggestion alterations. When the new edition of a book I love comes out, I have to decide to buy it, and either start all over again transferring comments, or stay with the old one and risk missing something new and wonderful. It's especially bad when the new edition leaves out some of my favorite recipes from the old edition. So much for trying to simplify; now I own both). I don't think you can even buy the cookbook anymore (new, that is).
It's a stovetop recipe, my daughters both love it, it's very easy, and the keys to making it insanely creamy are:
*evaporated milk
*eggs
*having part of the cheese (half for me, usually) be smooth-melting American, which I normally avoid like the plague
You can saute some bread crumbs in butter and garlic and or parmesan if you'd like, to serve on top. If you do that, run the pan briefly under the broiler to brown the topping. I never even bother.
2 large eggs
1 can evaporated milk, divided
1/4 tsp tabasco
2 tsp salt, divided
1/4 tsp pepper
1 tsp dry mustard, dissolved in 1 tsp water
1/2 lb elbow macaroni
4 tbs unsalted butter
12 oz cheese (I use half sharp cheddar, half american) grated
*Mix eggs, 1 cup of the milk, tabasco, 1/2 tsp of the salt, pepper, and mustard mixture in small bowl and set aside.
*Bring 2 quarts water to a boil in large, heavy saucepan. Add remaining salt and macaroni; cook until tender. Drain and return to pan over low heat. Add butter and toss to melt.
*Pour egg mixture over noodles along w/3/4 of the cheese; stir until thoroughly combined and cheese begins to melt. Gradually add remaining milk and cheese, stirring constantly, until mixture is hot and creamy (5 minutes or so).
Serve immediately.
Wednesday, January 03, 2007
Mulled Wine (Gluehwein)
You know, you do what you need to do to get through the holidays. Other people pray or go to therapy or exercise or climb to the tops of belltowers. We like this recipe. It's for those nights where regular wine just isn't doing enough for you and you need to get some extra sugar and alcohol into your system.
Thanks to "A Cook in Seattle" who posted this recipe in a review of a not-loved mulled wine recipe on Epicurious.
*2 bottles of red wine; cheap is fine
*zest or orange part of peel of two oranges (leave the bitter white behind)
*6-8 cinnamon sticks
*8-10 whole cloves
*8-10 whole allspice (allspices?)
*2 star anise
*1 cup sugar
*1/2-1 cup of dark rum
Slowly heat the wine with everything but the rum-don't let this boil! Keep at heat for 10 minutes or so. Remove from heat and add rum to taste. It works well to put this in a crockpot on low heat for serving at a party. You can strain it, if you'd like.
Poblano Corn Pudding
I suppose this recipe isn't really in keeping with the alleged theme of my blog, as many kids wouldn't eat these spicy chiles. You could adapt the recipe and use a milder chile (though poblanos are pretty mild) or a regular bell pepper. The non-pepper bits of this were loved by our baby.
Thanks so much to my sister for the suggestion of this recipe. She made it for a book club and for Christmas dinner w/her boyfriend's family; I made it for husband's work party and a New Year's Eve party. Adapted from epicurious.com.
*4 poblano chiles
*4 cups frozen corn kernels, thawed (or fresh, in season), divided
*4 large eggs (I've made this w/egg substitute and it's fine)
*1 cup unsalted butter, melted, cooled slightly
*1 1/2 tsp salt
*2 large pinches baking powder (1/4 tsp or so)
*2 cups light sour cream
*1 cup masa (corn tortilla mix)
*3 oz prosciutto or Serrano ham, diced (optional)
*2 cups grated smoked cheddar
-Place chiles on baking sheet under preheated boiler. Watching carefully, broil until blackened, turning so each side is done. Remove and place in brown paper bag; roll top to seal and allow to steam for 15 minutes.
-Carefully peel charred skin from chiles. Remove stem and seeds. I used plastic bags on my hands the second time doing this, as the first time the chile oil was very difficult to remove (not a great thing when you have a nursing baby). Dice chiles and set aside.
-Preheat oven to 350. Butter a 9x13" dish.
-Combine 3 cups of the corn, eggs, butter, salt, and baking powder in a blender; blend until smooth. Place in large bowl and add masa, sour cream, ham, cheddar, chiles, and remaining corn. Stir to blend and spoon into baking dish.
-Bake for 40-45 minutes, until golden and puffy.
No-Knead Bread

This bread is sweeping the food blogging world (man, is my life exciting! Always on the cutting edge). According to notmartha.com, it " Appeared in the article The Secret of Great Bread: Let Time Do the Work by Mark Bittman in the November 8th, 2006 New York Times
Adapted from Jim Lahey, Sullivan Street Bakery"
Allow at least a full 24 hours to make this, possibly more. It takes very little hands-on time during that period, but I found it needed close to 24 hours to sit the first time, and then a several hour rising period at the end of it, plus baking time. It was probably only 15 minutes of hands-on time in that period, including cleaning pots and pans. The long rise lends a wonderfully yeasty flavor (and there is a very small amount of yeast in the recipe). The bread is slightly sour and has a wonderfully flaky, crispy crust.
I baked it in a 6 qt stockpot, oven proof. Notmartha recommends a smaller pan, 4 quarts or so, but I didn't have one the right size and the loaf I made turned out beautifully. Wonderful dipped in olive oil, or toasted with butter and honey.
Recipe, with notmartha's and my adaptations:
Time: About 1 1/2 hours plus 14 to 20 hours’ rising
- 3 cups all-purpose or bread flour, more for dusting (I have had good luck with both kinds of flour, and also with substituting one cup of whole wheat flour)
- 1/4 teaspoon instant [aka Rapid Rise, QuickRise, Instant Active Dry, Perfect Rise, or Bread Machine Yeast] yeast
- 1 3/4 teaspoons salt
-1 1/2 cups water
- Cornmeal or wheat bran as needed for flouring towels (I use cornmeal).
1. In a large bowl combine flour, yeast and salt. Add water, and stir until blended; dough will be shaggy and sticky. Cover bowl with plastic wrap. Let dough rest at least 12 hours, preferably about 18, at warm room temperature, about 70 degrees. [I put it on top of my fridge.]
2. Dough is ready when its surface is dotted with bubbles. Lightly flour a work surface and place dough on it; sprinkle it with a little more flour and fold it over on itself once or twice-cover loosely with plastic wrap and let rest about 15 minutes (I've always skipped this step with no problems).
3. Using just enough flour to keep dough from sticking to work surface or to your fingers, gently and quickly shape dough into a ball. Generously coat a cotton towel (not terry cloth) with cornmeal (what I use), wheat bran, or rice flour; put dough seam side down on towel and dust with more cornmeal. Cover with another cotton towel and let rise for about 2 hours. When it is ready, dough will be more than double in size and will not readily spring back when poked with a finger.
4. At least a half-hour before dough is ready, heat oven to 450 degrees. Put a 6- to 8-quart [about a 4-quart pot is preferred] heavy covered pot (cast iron, enamel, Pyrex or ceramic) in oven as it heats. When dough is ready, carefully remove pot from oven. Slide your hand under towel and turn dough over into pot, seam side up; it may look like a mess, but that is O.K. Shake pan once or twice if dough is unevenly distributed; it will straighten out as it bakes. Cover with lid and bake 30 minutes, then remove lid and bake another 10 or 15 minutes, until loaf is beautifully browned. Cool on a rack.
Yield: One 1 1/2-pound loaf.
Subscribe to:
Posts (Atom)